Uncut Sheets of 1963 Fleer Football Cards
Following is the configuration of an uncut 132-card sheet of 1963 Fleer football cards. I assembled this from a photo of an actual sheet. If you hold your cursor above a card, your browser should show you the number of the card and the name of the player. Clicking on a card will bring up the full-sized scan. (A real uncut sheet would not have lines between the cards--that's an effect of scanning them individually.)
 |
 |
 |
 |
 |
 |
 |
 |
 |
 |
 |
 |
 |
 |
 |
 |
 |
 |
 |
 |
 |
 |
 |
 |
 |
 |
 |
 |
 |
 |
 |
 |
 |
 |
 |
 |
 |
 |
 |
 |
 |
 |
 |
 |
 |
 |
 |
 |
 |
 |
 |
 |
 |
 |
 |
 |
 |
 |
 |
 |
 |
 |
 |
 |
 |
 |
 |
 |
 |
 |
 |
 |
 |
 |
 |
 |
 |
 |
 |
 |
 |
 |
 |
 |
 |
 |
 |
 |
|
|
|
|
|
|
|
|
|
|
|
|
|
|
 |
|
|
|
|
|
|
|
|
|
|
|
|
|
|
|
|
|
|
|
|
|
|
|
|
|
|
|
|
|
This is how the cards on the sheet are numbered. You can see a pattern to the numbering, where the cards in each column are numbered sequentially, four at time. After every fourth card in the sequence, the numbering picks up and resumes three columns to the right. The numbering of the top four rows of the sheet is repeated in the bottom four rows. The only break in the numbering appears where Fleer inserted the unnumbered checklist. On this sheet it displaced card #6, Charles Long, one of the short prints. (The checklist is not numbered, but I called it #0.)
| 1 | 33 | 61 | 5 | 37 | 65 | 9 | 41 | 69 | 13 | 45 |
| 2 | 34 | 62 | NNO | 38 | 66 | 10 | 42 | 70 | 14 | 46 |
| 3 | 35 | 63 | 7 | 39 | 67 | 11 | 43 | 71 | 15 | 47 |
| 4 | 36 | 64 | 8 | 40 | 68 | 12 | 44 | 72 | 16 | 48 |
| 73 | 17 | 49 | 77 | 21 | 53 | 81 | 25 | 57 | 85 | 29 |
| 74 | 18 | 50 | 78 | 22 | 54 | 82 | 26 | 58 | 86 | 30 |
| 75 | 19 | 51 | 79 | 23 | 55 | 83 | 27 | 59 | 87 | 31 |
| 76 | 20 | 52 | 80 | 24 | 56 | 84 | 28 | 60 | 88 | 32 |
| 1 | 33 | 61 | 5 | 37 | 65 | 9 | 41 | 69 | 13 | 45 |
| 2 | 34 | 62 | 6 | 38 | 66 | 10 | 42 | 70 | 14 | 46 |
| 3 | 35 | 63 | 7 | 39 | 67 | 11 | 43 | 71 | 15 | 47 |
| 4 | 36 | 64 | 8 | 40 | 68 | 12 | 44 | 72 | 16 | 48 |
The 132-card sheet above was originally half of a 264-card sheet configured like the 1966 Topps baseball card sheet pictured here. You can see on the baseball card sheet that the top eight rows (88 cards) on the left half of the sheet are repeated twice more on the full sheet. Following the pattern from the baseball card sheet, we can construct the second half of the full 1963 Fleer football card sheet. On the second half, the checklist displaced the Bob Dougherty card, the other short print in the set. This is what the second half looked like:
|
|
|
|
|
|
|
|
|
|
|
|
|
|
|
|
|
|
|
|
|
|
|
|
|
|
|
|
|
|
|
|
|
|
|
|
|
|
|
|
|
|
|
|
|
|
|
|
|
|
|
|
|
|
|
|
|
|
|
|
|
|
|
|
|
|
|
|
|
|
|
|
|
|
|
|
|
|
|
|
|
|
|
|
|
|
|
|
|
|
|
|
|
|
|
|
|
|
|
|
|
|
|
|
|
|
|
|
|
|
|
|
|
|
|
|
|
|
|
|
|
|
|
|
|
|
|
|
|
|
|
|
Looking at both halves of a full sheet, you can see the short prints are actually not that short. Most of the cards appear three times on the full sheet, and the Long, Dougherty, and checklist each appear twice. This three-to-two disparity is way overblown by the price guides. The latest Beckett I have (admittedly, a few years old) has the Long and Dougherty at 15-20 times the value of the other commons. PSA's Sports Market Report puts them at about six times the value of the other commons. In practice you will find that the Long and Dougherty cards sell for far less than what the price guides say, because there is really no shortage of them.
The checklist, on the other hand, is indeed a tough card, but it is tough because of its centering, not its rarity. The borders on the checklist are very thin, which exaggerates any off-centering.
This table shows the numbering of the cards on the second half of the 264-card sheet. As with the 1960 Fleer set, in general it is the cards on the edges of the sheet that are more difficult to find in top condition. At the time of this writing, other than the checklist, the cards with the fewest examples graded PSA 8 and PSA 9 are numbers 1, 2, 4, 25, and 81. Numbers 1, 2, and 4 are on the left edge of both half-sheets; and numbers 25 and 81 are on the top of the second half-sheet.
| 73 | 17 | 49 | 77 | 21 | 53 | 81 | 25 | 57 | 85 | 29 |
| 74 | 18 | 50 | 78 | 22 | 54 | 82 | 26 | 58 | 86 | 30 |
| 75 | 19 | 51 | 79 | 23 | 55 | 83 | 27 | 59 | 87 | 31 |
| 76 | 20 | 52 | 80 | 24 | 56 | 84 | 28 | 60 | 88 | 32 |
| 1 | 33 | 61 | 5 | 37 | 65 | 9 | 41 | 69 | 13 | 45 |
| 2 | 34 | 62 | 6 | 38 | 66 | 10 | 42 | 70 | 14 | 46 |
| 3 | 35 | 63 | 7 | 39 | 67 | 11 | 43 | 71 | 15 | 47 |
| 4 | 36 | NNO | 8 | 40 | 68 | 12 | 44 | 72 | 16 | 48 |
| 73 | 17 | 49 | 77 | 21 | 53 | 81 | 25 | 57 | 85 | 29 |
| 74 | 18 | 50 | 78 | 22 | 54 | 82 | 26 | 58 | 86 | 30 |
| 75 | 19 | 51 | 79 | 23 | 55 | 83 | 27 | 59 | 87 | 31 |
| 76 | 20 | 52 | 80 | 24 | 56 | 84 | 28 | 60 | 88 | 32 |
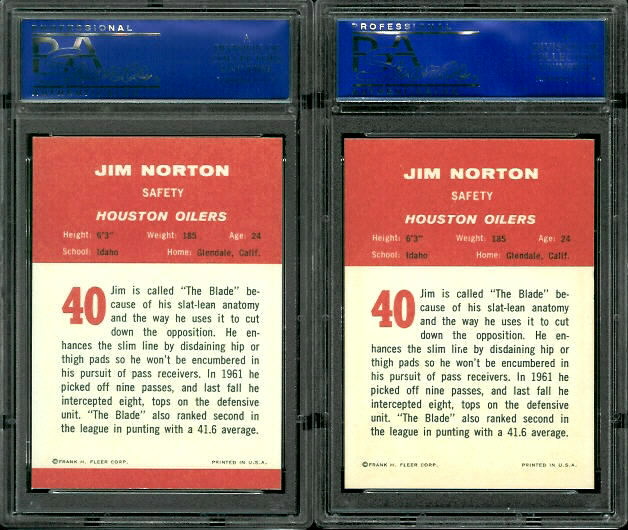
Finally, as I wrote in this blog post, cards in this set with numbers divisible by 4 can be found both with and without a red stripe on the back. I have not seen the back of a sheet, but my guess is that the cards on the bottom did not have the stripe. So, for each of the cards with a number divisible by 4, there should be two with a stripe for every one without a stripe. The only exception is #64, Bob Dougherty, one of the short prints. The Dougherty card that the checklist displaced would have had a stripe, so the number of striped and non-striped Dougherty cards should be equal.
(Thanks to Wolfbear, who made many of these observations.)
For more virtual uncut sheets, see the Gallery's master uncut sheet page.